Getting Started with Service Foundry Builder using Bootstrap Job
- GitOps Driven Kubernetes Platform
- Getting Started with Service Foundry Builder as Kubernetes Job using Helm
- Service Foundry Builder
- 1. Add helm repo service-foundry
- 2. Create service-foundry namespace
- 3. Create aws-secret
- 4. Create service-foundry-github-ssh
- 5. Create service-foundry-config-files
- 6. Create service-foundry-builder job using Helm chart
- 7. Check Kubernetes resources created by Service Foundry Builder
- 8. Clean up
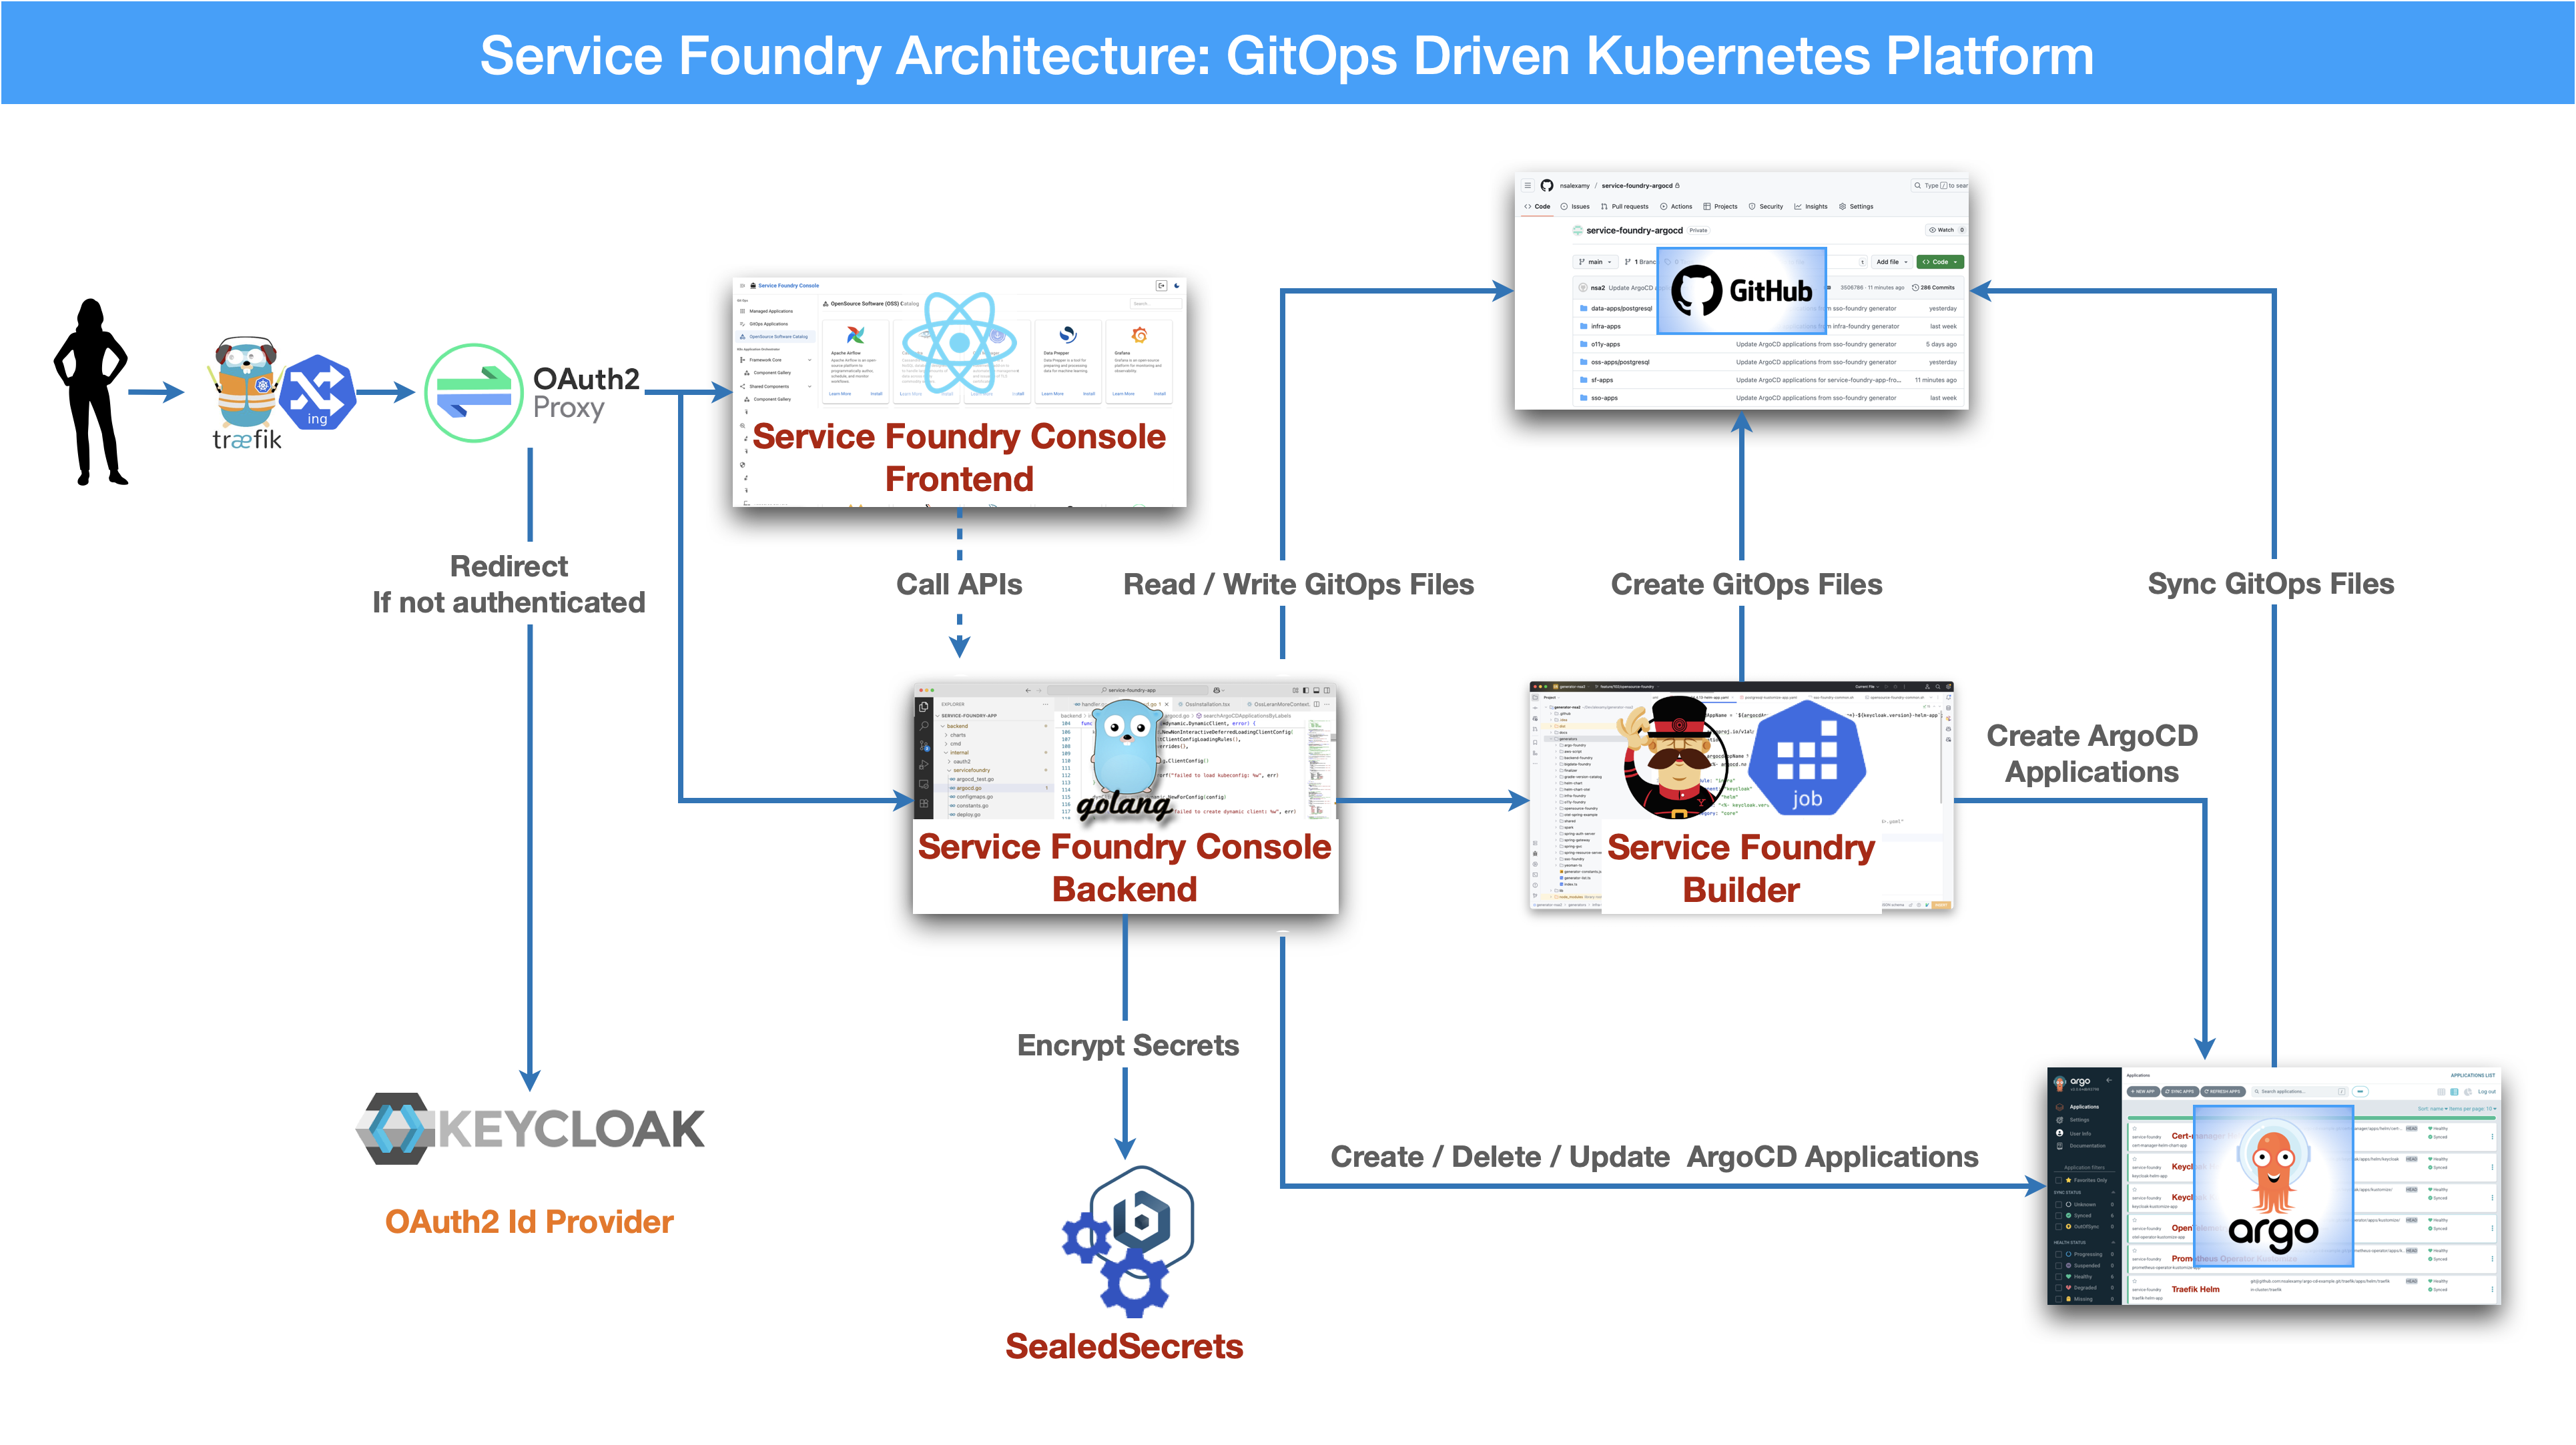
GitOps Driven Kubernetes Platform
Service Foundry provides GitOps driven Kubernetes platform to automate the deployment and management of Kubernetes resources using Git as the single source of truth. ArgoCD is used as the GitOps tool to manage the Kubernetes resources.
Getting Started with Service Foundry Builder as Kubernetes Job using Helm
Service Foundry Builder
Service Foundry Builder is a tool for building and deploying applications in a Kubernetes environment. It provides a set of tools and best practices for building, deploying, and scaling applications in a cloud-native way.
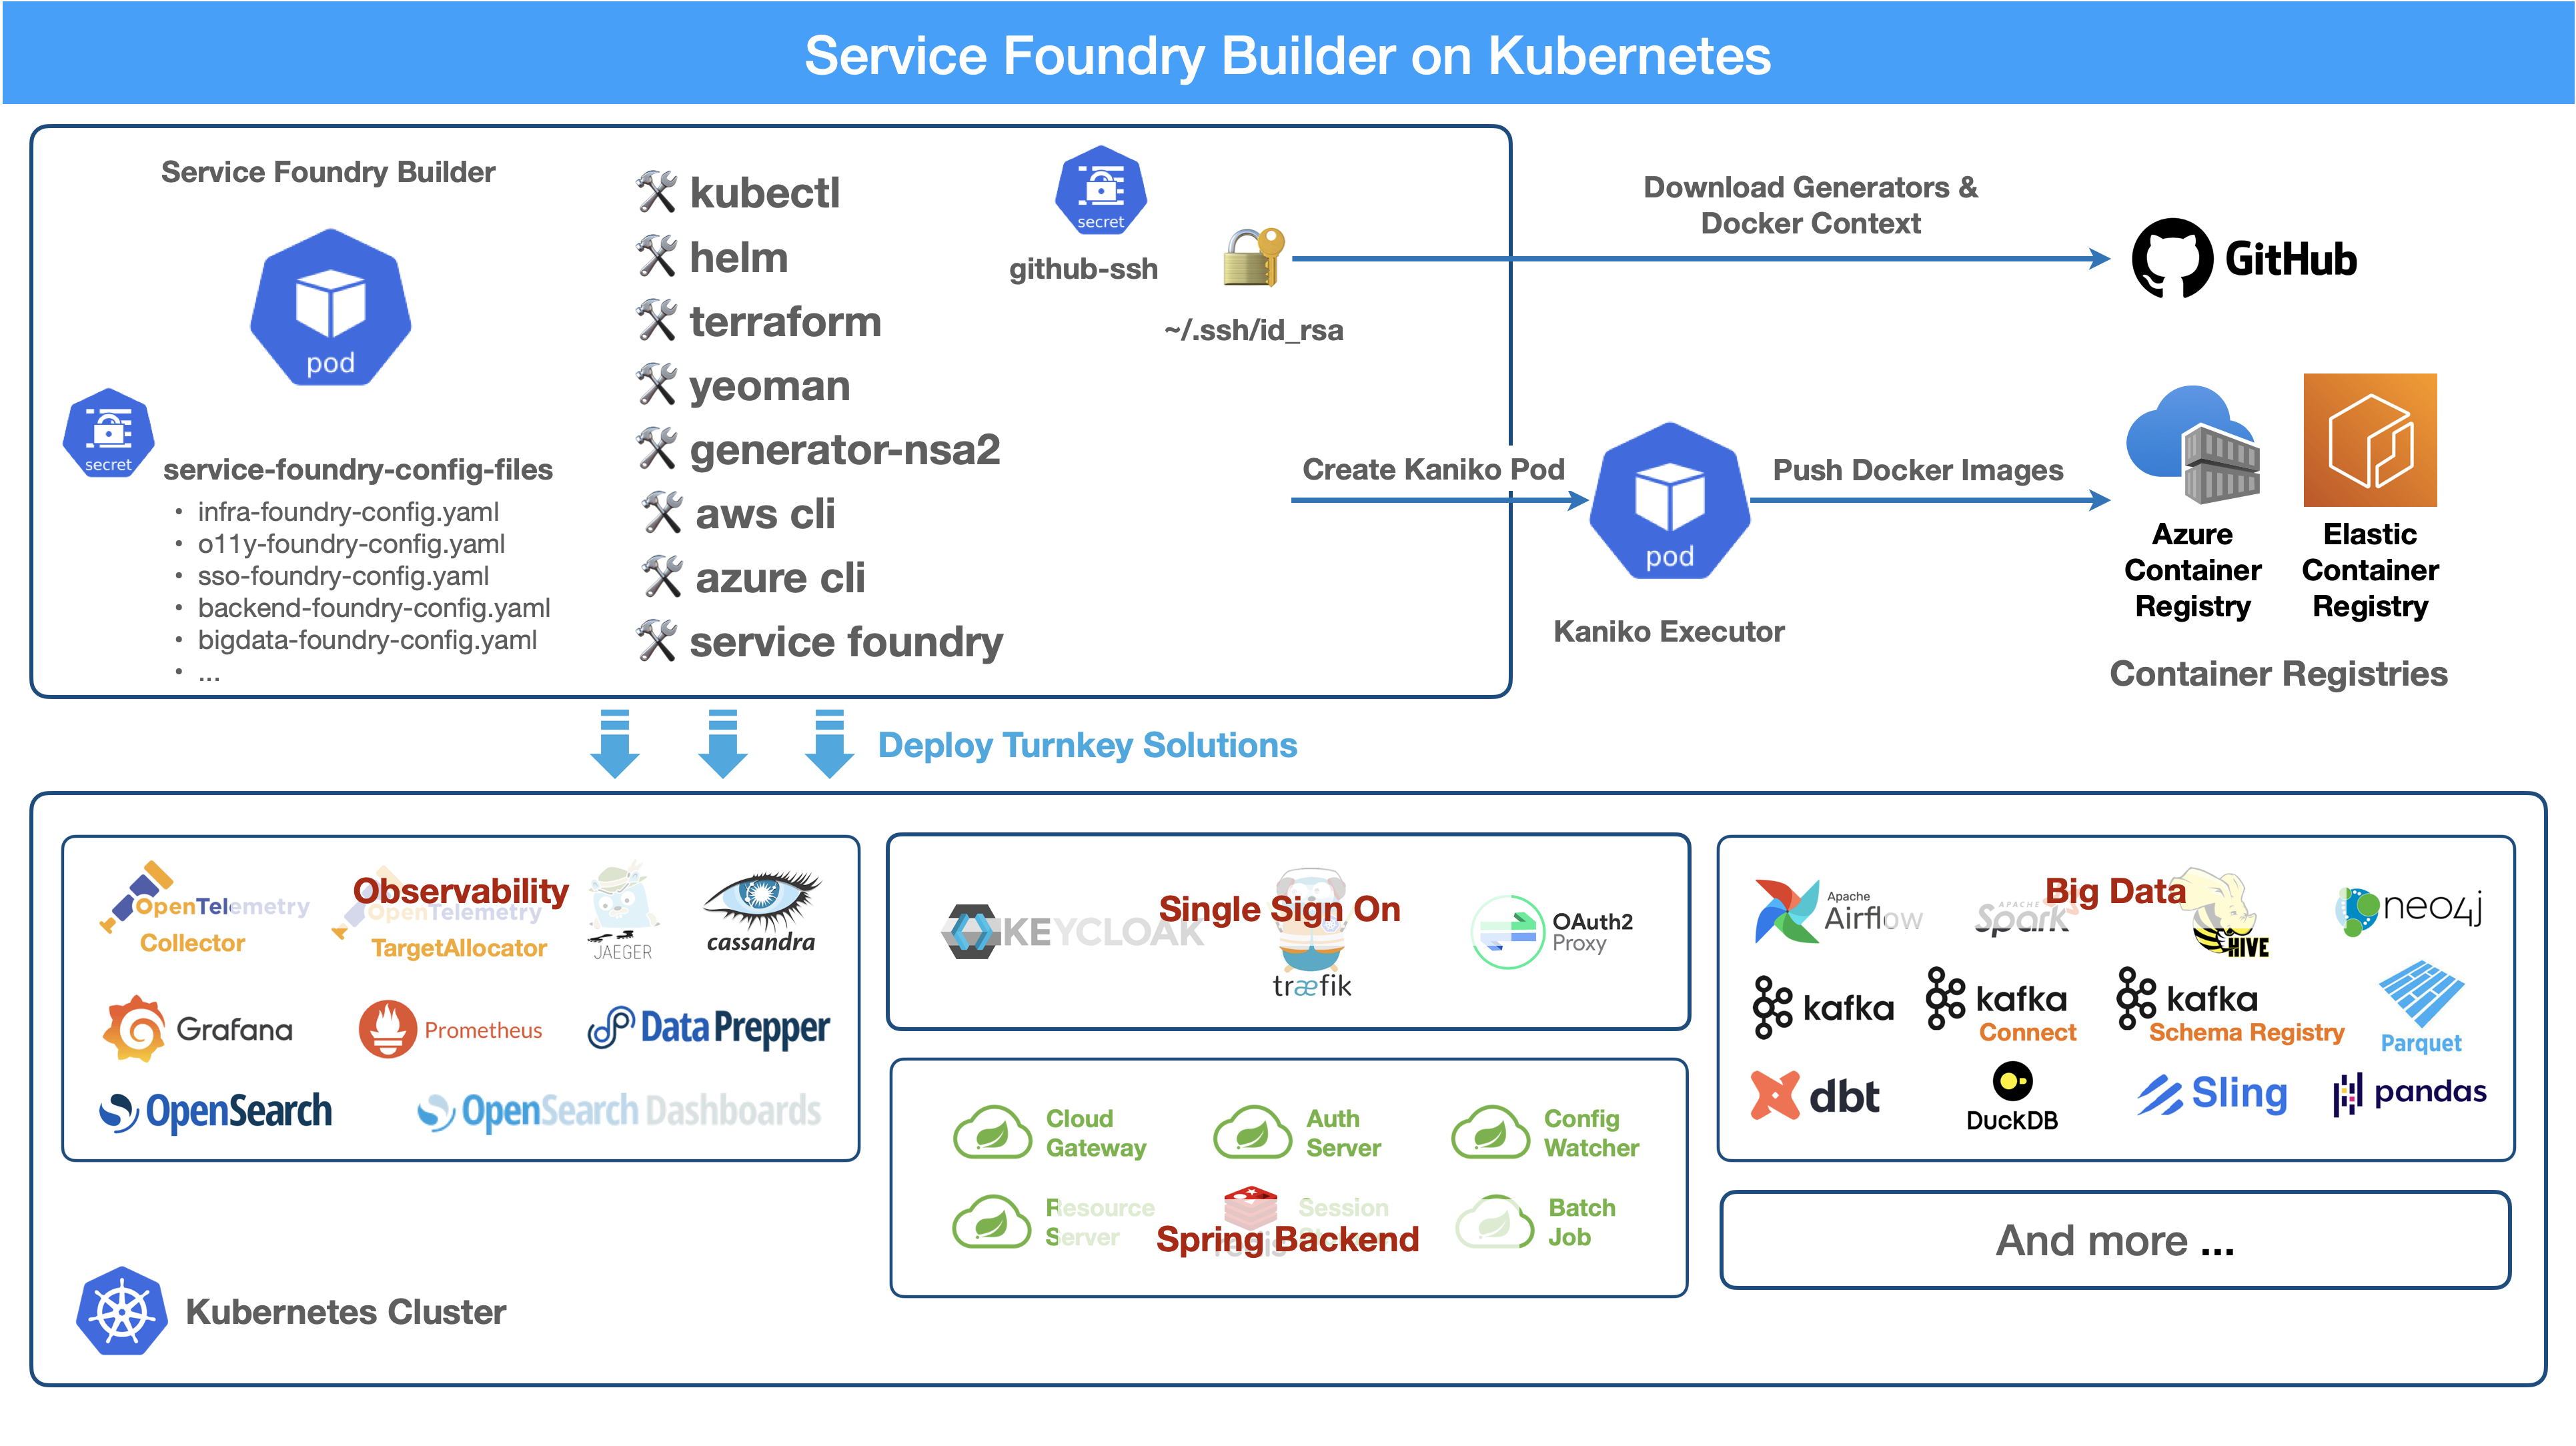
GitHub SSH key is required to run Service Foundry Builder. Contact the Service Foundry team to get the SSH key.
1. Add helm repo service-foundry
$ helm repo add service-foundry https://nsalexamy.github.io/helm-charts2. Create service-foundry namespace
$ kubectl create namespace service-foundry3. Create aws-secret
| Make sure that you DO NOT store your AWS_ACCESS_KEY_ID and AWS_SECRET_ACCESS_KEY in plain text. Try to use IRSA or other secure methods to store your AWS credentials. |
$ kubectl -n service-foundry create secret generic aws-secret \
  --from-literal=AWS_ACCOUNT_ID=$AWS_ACCOUNT_ID \
  --from-literal=AWS_REGION=$AWS_REGION
4. Create service-foundry-github-ssh
$ kubectl -n service-foundry create secret generic service-foundry-github-ssh \
    --from-file=./id_rsa --from-file=./id_rsa.pub
5. Create service-foundry-config-files
- NOTE
-
In Bootstrap mode, the command is not required.
6. Create service-foundry-builder job using Helm chart
$ helm install service-foundry-builder \
service-foundry/service-foundry-builder \
--set command=bootstrap \
-n service-foundry --create-namespace \
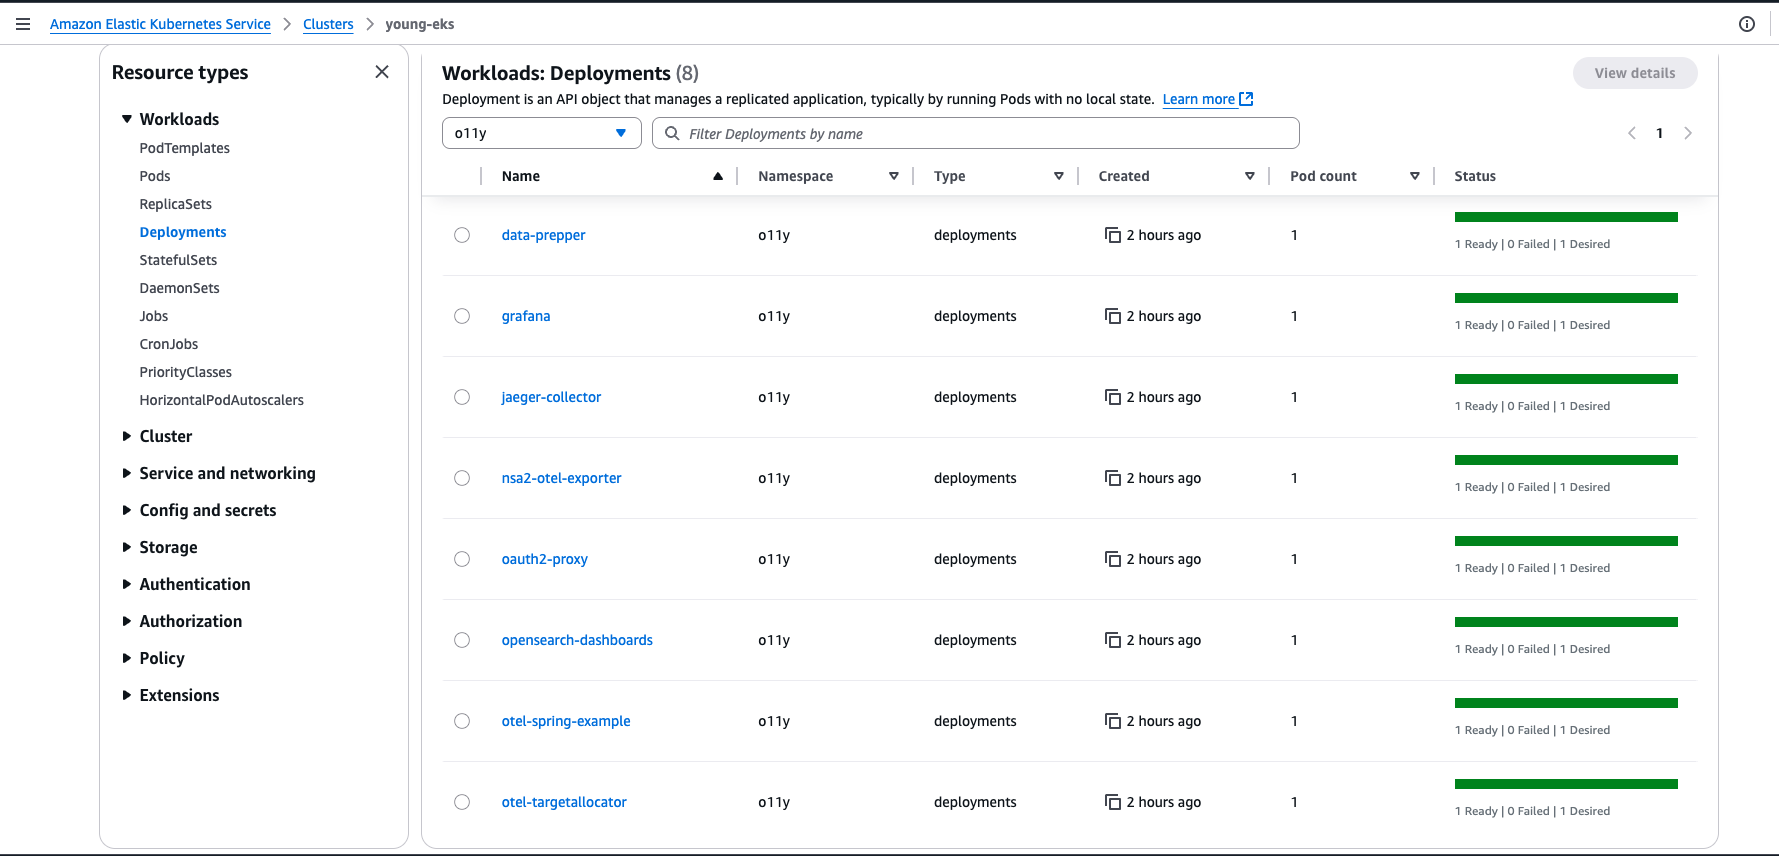
--version $SF_BUILDER_CHART_VERSION7. Check Kubernetes resources created by Service Foundry Builder
You can check the Kubernetes resources created by Service Foundry Builder on AWS Admin Console.
8. Clean up
To clean up the resources created by Service Foundry Builder, you can use the following command:
# Delete all ArgoCD Applications
$ kubectl delete applications --all -n argocd

$ helm -n argocd uninstall argocd
$ helm -n service-foundry uninstall service-foundry-builder

$ kubectl delete namespace argocd service-foundry traefik